
After getting rid of the previous light table I made, I had been wanting to build another out of commonly available materials. Upon my first visit to an Ikea store I felt highly motivated by the elegance and absolute functionality of the design throughout the store; I left the store with the components needed to build a more mainstream light table.
BOM
Glassholm Table Top $25.99
Lerberg Trestle $10.00
LED Strip $10.88
Barrel jack to terminal strip $.99
Terminal Strip $2.59/6 = $.43
Total = $60.45
To find super cheap and super bright LED strips, search on ebay using this string: 3528 LED 600 strip
Building
Having put the table together on the first night I got it, it took a good month before I found the motivation to attach the lights. My boss ended up mentioning how cool he thought my light table looked and with my friend just having moved into a new place this week (and needing a house warming gift), it was almost like happenstance was twisting my arm to finish this project.
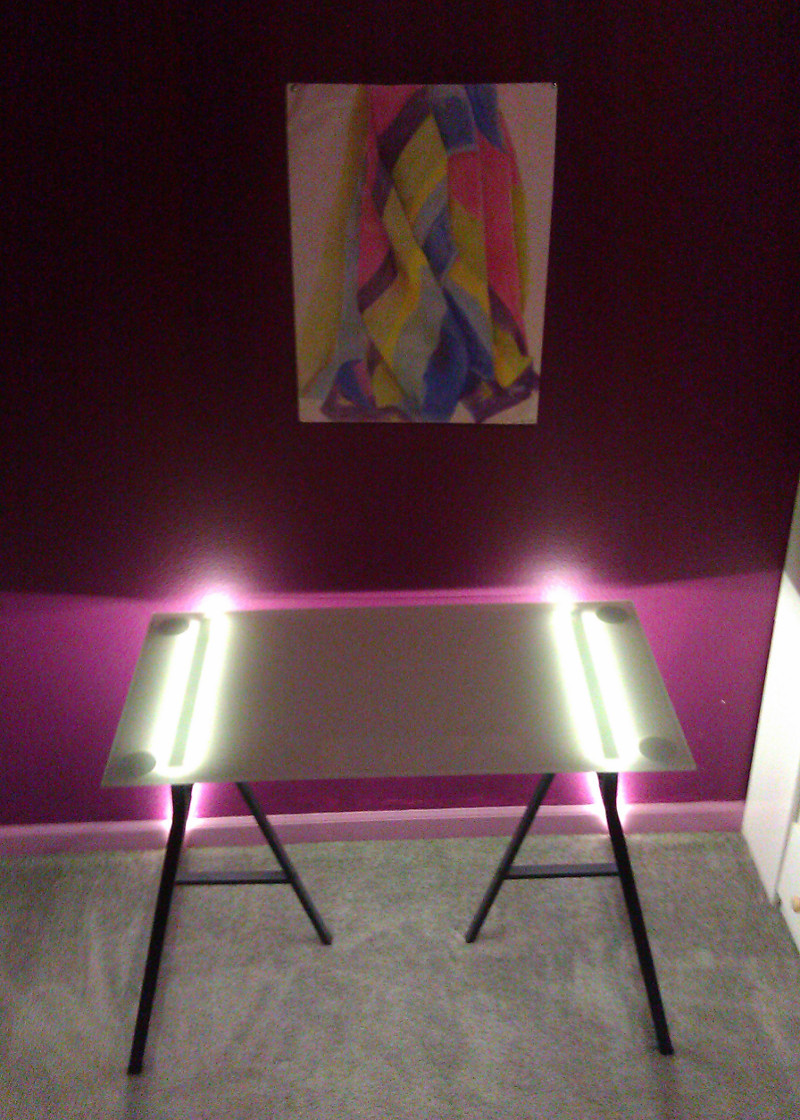
I first determined the optimal locations for attaching the LED strips to the trestle. I then did a test placement with the LED’s lit up to determine how close to the glass to mount the LED strip. The distance from the glass matters, as too close would produce hot spots rather than the consistent glow that is far more elegant. The lower edge produced the effect that I desired.
Rubbing alcohol was used to prep the surface prior to applying the LED strips. Applying the LED strips to the lower edge of the trestles was simple. As I pondered how to wire this light table in the most efficient manner I came to the conclusion that it would be best to use a truly modular, dare I say Ikea-esque, approach and use barrel jack to terminal strip and a regular terminal stip. This would allow for anyone with a screw driver to configure the arrangement of such items. I would have liked to have gone with plug-type connectors, but I did not have any handy and I felt like this approach would better support future addition of LED strips (i.e. around the frame of a painting).
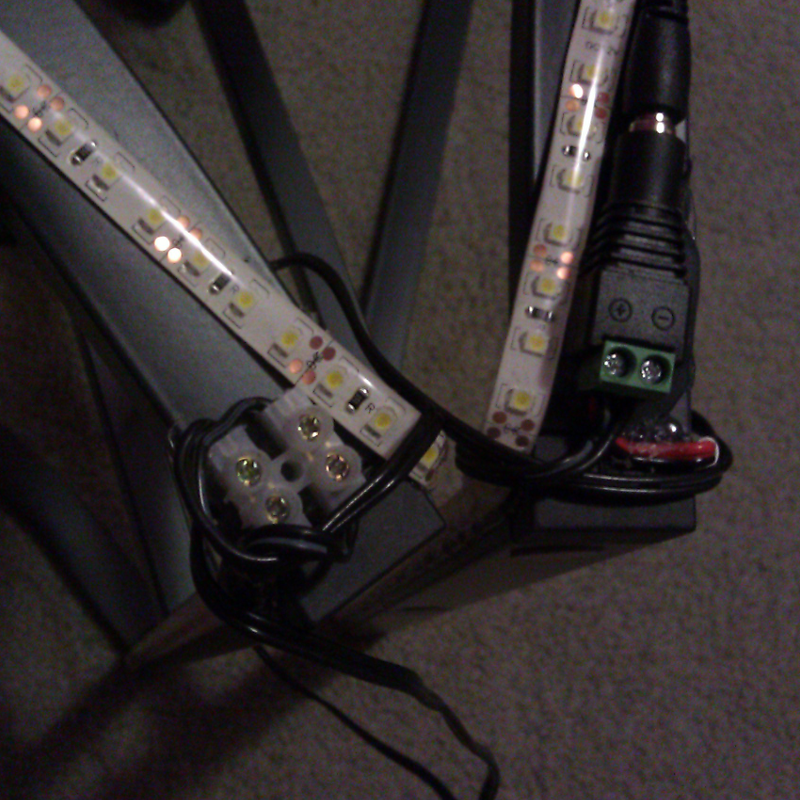
The terminal connectors were affixed to the trestles using hot glue, as I didn’t see this table ending up in an environment that warranted the use of epoxy. All wire tips were tinned with solder. The wire running between the trestles was looped around each trestle as a way to provide some rudimentary strain relief.
The power supply was one for an external hard drive that happened to have the same diameter barrel as the barrel jack terminal strip.
The only issue I had was when I was going a little too wild with the hot glue. I placed a small bead of hot glue along the top to the LED strip to better secure it to the trestle, this didn’t work out so good because it cast an inconsistent shadow across the glass surface. I am so surprised how simple and modern the table was to begin with, but with the light table upgrades it takes it to a whole nother level in terms of elegant design. While I am happy with the price, the size of this table is tight and comfy for a single person. In the future I would like to give these two options a go: The Galant Desk and a Galant Desktop Shelf.

The table actually in use.